
This is the third post in my ‘DNA for kids’ blog series and the second hands-on activity to help you introduce your child to the wonderful molecular world of life. I will take you through the very easy steps for how to extract DNA from an apple (or other fruit) so that your child can play with real DNA!
If you’ve already been through parts 1 and 2 your child will understand that DNA it is:
- A very big molecule in the shape of a double helix
- Instructions for building living things from a single cell
- Written in a four-letter code (A, T, G, C) with special base-pairing rules
- Found inside almost every living cell
- Read differently by different cells at different times
- Controlled by the very molecular tools it encodes
- The most amazing molecule in the Universe
Now for some hands-on fun!
How to extract DNA#
With your help, your child can actually extract and play with real DNA! They can watch it precipitate out of a solution, fish it out, hold it in their hand and feel how squishy it is between their fingers.
They can see the most amazing molecule in the Universe with their own eyes. No special equipment necessary – only common household supplies!
This was a big hit with my kids. They never imagined they could actually extract DNA themselves and see it with their own eyes. They were so excited – we could have spent all day on it!
It is very easy. Watch the video for a recap on DNA and the step-by-step instructions for extracting DNA from an apple (or other fruit). I’ve written out more details for each step below.
Here goes!
You will need#
- A piece of fruit (fruit that is easy to squash like strawberries, kiwi fruits or bananas work well but if you have a blender most fruits or vegetables will work: we used an apple)
- 2 dl water
- 1 tsp salt
- 1/2 dl washing-up liquid
- About 50 ml of alcohol-based hand-sanitiser (the higher the alcohol content the better – we used 80%)
- Something to cut and crush the fruit (like a knife and a wooden spoon – or a blender)
- Access to a freezer
- A cheesecloth or similar loosely-woven cloth for filtering – if you don’t have a cheesecloth you can try a tea towel (a coffee filter should also work if it’s strong but ours kept breaking)
- A funnel (optional but helps with the filtering)
- One or two medium-sized drinking glasses or similar containers (we used an old jam jar)
- A small glass – the smaller the diameter of the glass the less hand sanitiser you will need and the easier it will be to fish out the DNA (we used a small shot glass)
What to do#
1. Prepare your materials#
- Put the alcohol-based hand sanitiser in the freezer. It works best when it’s cold.
- Wash and remove any leaves, peel/skin or stalks from your fruit.
2. Free the DNA from the cells#
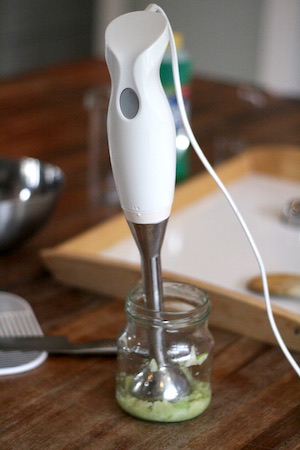
- Crush your fruit together with the salt and water – we sliced the apple then blended it together with the water and salt with a hand blender. This starts the process of breaking up the cells. The salt helps to make the DNA come out of solution (precipitate) while keeping other molecules (like proteins) in solution.
- Pour the crushed/blended fruit into a medium-sized drinking glass and carefully pour and mix in the washing up liquid (try not to create bubbles). The washing up liquid helps to break down the cells further.
- Leave the mixture for 10 minutes.
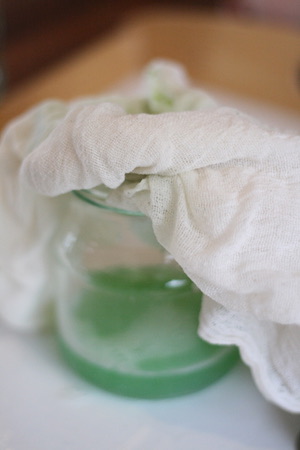
3. Filter your solution#
- Place the funnel (if you have one) over a medium-sized drinking glass and put your filter inside. We used a cheesecloth folded over twice and that worked well. You can also try a coffee filter.
- Pour your solution through the filter. This is to remove as much cell debris as possible.
4. Pull the DNA out of solution#
This is the fun part! Make sure your child is watching the alcohol layer. They should see white stringy material floating upwards – that’s DNA!
- Pour your solution into your smallest glass until it is about half full
- Grab your hand-sanitiser from the freezer.
- Tilt the glass and carefully squeeze the hand-sanitiser onto one side of the glass. Don’t squeeze it directly onto the solution – you want a nice layer to trickle down the side of the glass and rest on top. Add until the alcohol layer is about as high as the layer of solution.
- Place the glass back on a flat surface and watch the DNA precipitate into the alcohol layer. The longer you wait the more DNA there will be.
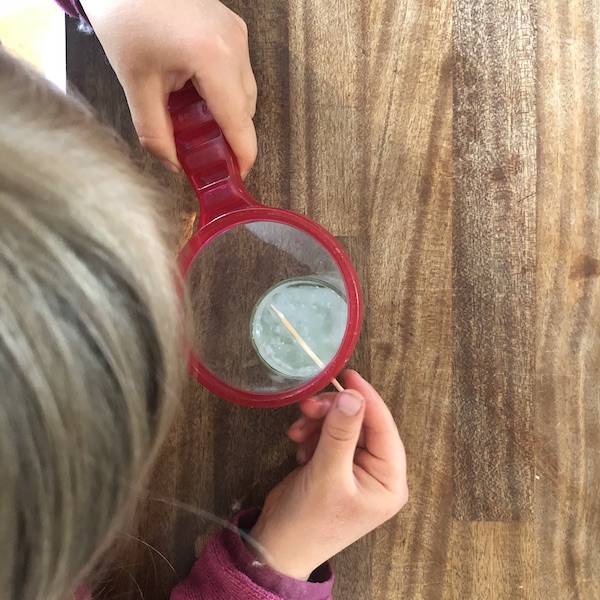
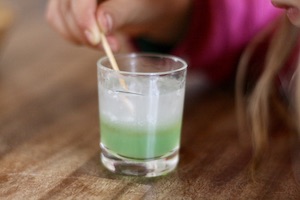
5. Fish out the DNA#
- Give your child a toothpick, or similar, and let them fish for DNA! It should be easy for them to see the white clumps floating around. Let them collect some in a small container (or a measuring spoon) and experiment with it!
6. Experiment#
Does your child have a lot of questions about how this process works or what else they can get DNA out of? Set up an experiment to test their ideas.
- Does it work as well if the alcohol is warm? You can try this straight away using any solution you have left over.
- What if you use less washing-up liquid?
- Does it matter how long you leave the solution before filtering?
- What else can you get DNA out of? Do some fruits have more DNA than others?
My kids wanted to extract DNA from everything after this!
More learning fun#
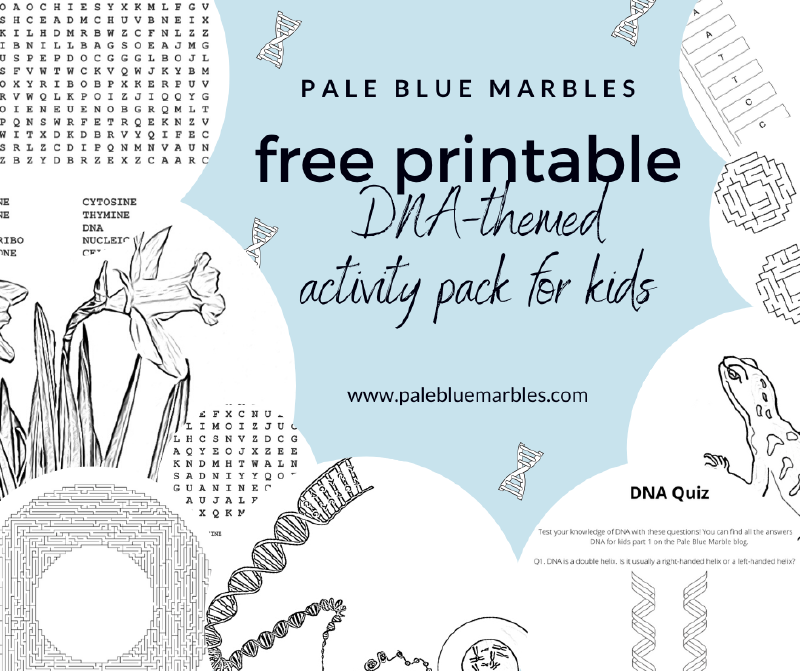
To supplement the first three posts of my ‘DNA for kids’ series, I’ve created a printable activity pack with DNA-themed puzzles, worksheets, quiz and colouring pages.
In part 4 of the ‘DNA for kids’ series, we will take a closer look at how the instructions encoded in DNA are followed to bring the blueprint to life: starting with another amazing molecule; RNA!